Create GPIO sensors
This page shows you how to onboard a proximity detector using the workflow for creating generic hardware devices as well as a generic GPIO service and skill.
Prerequisites
You will need:
- A proximity detector connected to an OPC/UA server
- The address of the OPC/UA server
- The signal name that the proximity detector is wired to trigger
Configure a proximity detector
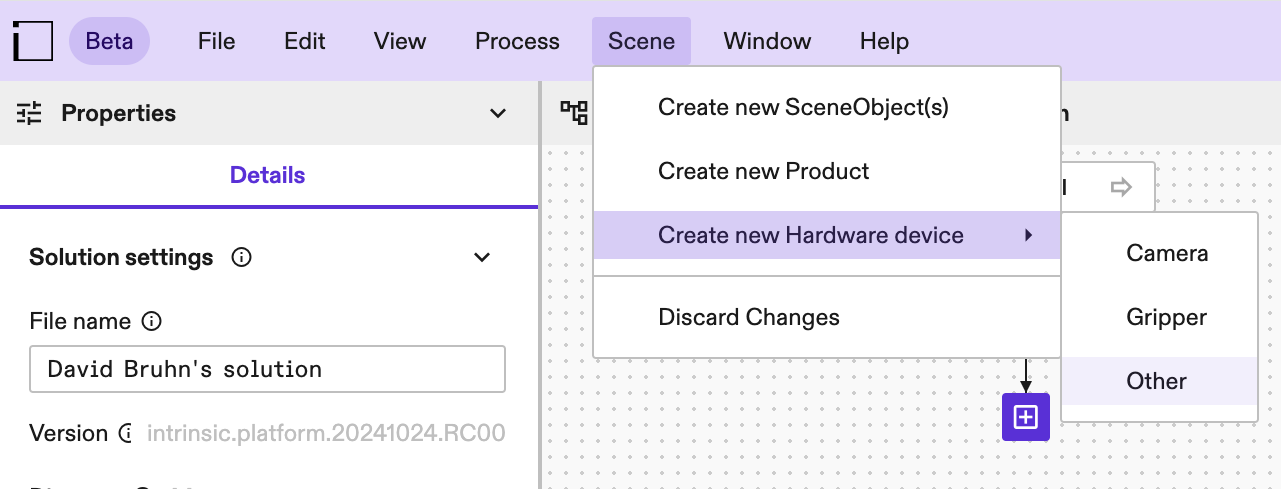
In the menu bar, click Scene -> Create new Hardware Device -> Other to open the Create new Hardware Device dialog:
Provide a display name for the asset and click Next. In the Upload geometry file section, upload this SDF or another geometry file for the sensor.
In the Choose Service options section of the dialog, click Choose Service, and then find the OPC-UA GPIO Service.
Configure the Service with the server address and OPC-UA nodes that the sensor is wired to trigger. This will depend on how the proximity detector was wired, but it might look something like this:
[type.googleapis.com/intrinsic_proto.gpio.OpcuaGpioServiceConfig]:  {
  opcua_server_address:  "opc.tcp://192.168.100.100:4840"
  opcua_nodes:  {
    node_id:  "ns=4;s=MAIN.blnSensorOn"
  }
}
Testing the proximity detector
In the process tree, click the + button to add Skill and search for gpio_wait_for_input.
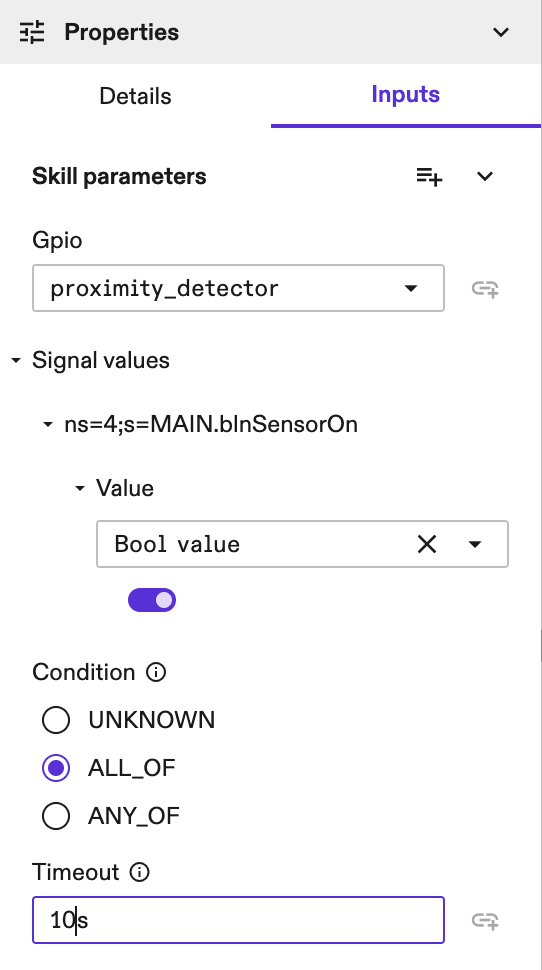
Configure the Skill by selecting the Service instance you just added as the GPIO parameter and by adding the signal value that you configured the Service to use:
To begin testing, first ensure the proximity detector is clear of any objects so it remains inactive. Then start the process by clicking Run.
While the process is running, move something in front of the proximity detector. The Skill should then finish its execution.