Motion Planning Inspector
To visualize historical robot motion planning data for debugging, use the Motion Planning Inspector (MPI). It allows you to load logged data using a unique logging ID, and then renders the input parameters, output trajectory, and a 3D world snapshot in a user-friendly interface.
This data provides valuable insights into the robot's motion planning process, helping you to understand and debug issues that may arise. By visualizing the trajectory and constraints, the MPI enables efficient identification and resolution of errors, leading to improved robot performance and reduced downtime.
Functionality
-
Data Loading: Load motion planning data by specifying:
- Unique motion planning logging ID
- The input form provides the expected format for these values.
-
Data Fetching: MPI fetches the relevant data from Google Cloud Storage (GCS) based on the provided information.
-
Visualization: MPI renders the fetched data on the frontend, including:
- Input parameters
- Output trajectory
- 3D world snapshot
-
Recompute Motion Plan: Edit input fields and recompute the motion plan to test how different input parameters affect the motion planner output and the robot's trajectory.
Interface layout
-
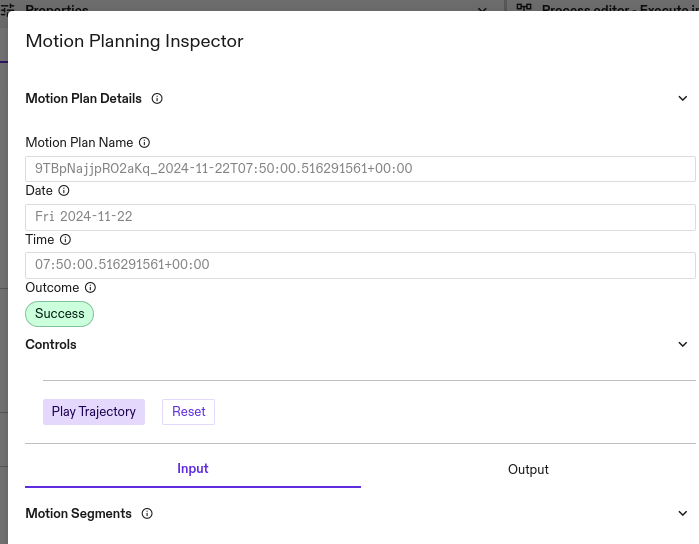
Details Section:
- Displays the unique logging ID, date, and time of the loaded log.
-
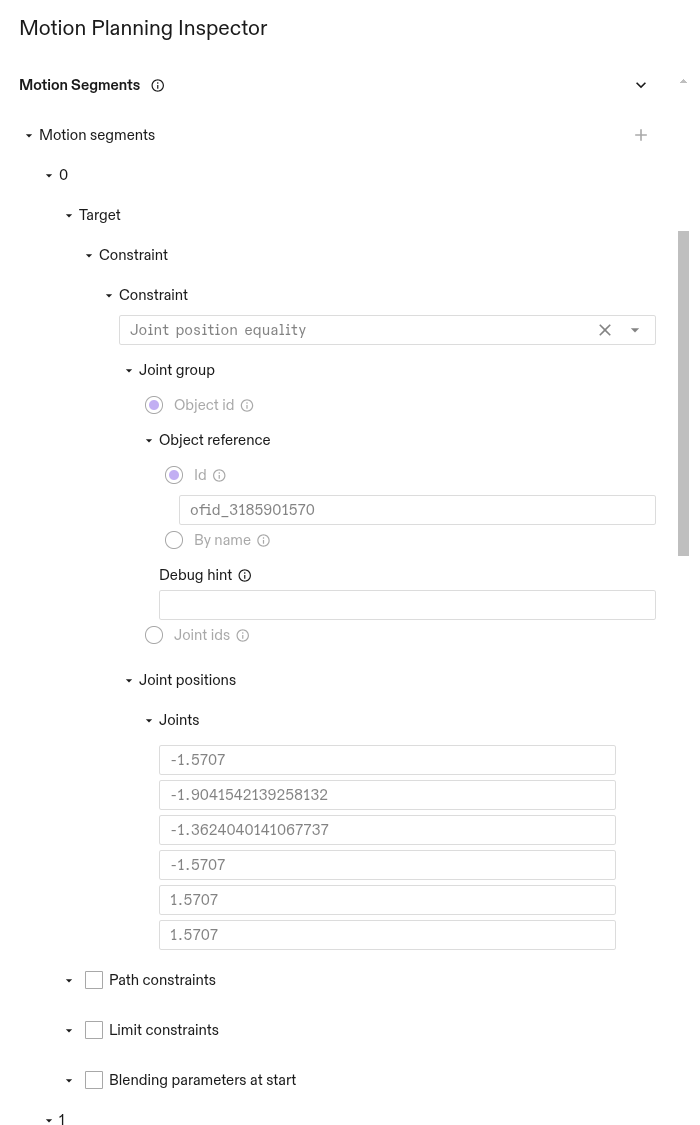
Input Tab:
- Shows all motion segments from the logged motion planning call.
- Details constraint types and information for each segment.
-
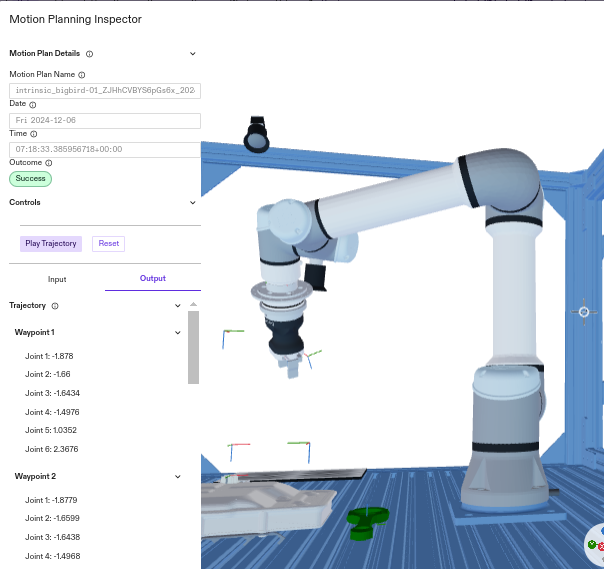
Output Tab:
- Presents the generated trajectory.
- Expandable to view waypoints and their corresponding joint positions.
-
Main Window:
- Renders a read-only 3D representation of the world state at the time of the logged motion planning call.
How to use
-
Find a Valid Motion Planning ID:
-
There are a few ways to locate the motion planning ID you are looking for.
-
If the motion planning ID is associated with an error, this ID is displayed as part of the error message.
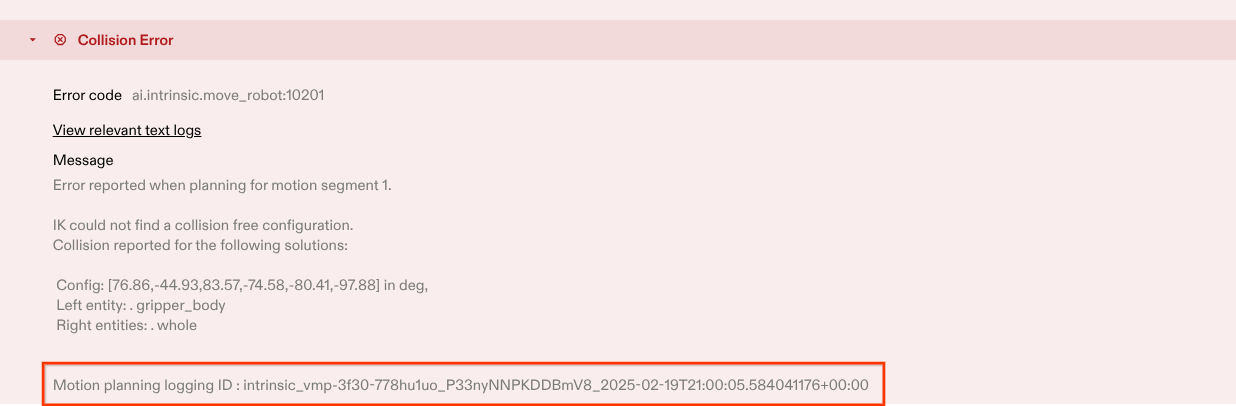
-
For a successful move_robot skill, the logging ID can be accessed from the skill output variables. To access the ID, select the
move_robotskill, navigate to the Output tab in the properties panel, and click the Add Link icon next to Logging id. You can then provide a name for the output variable. After the skill runs, the ID can be retrieved from the Variables tab.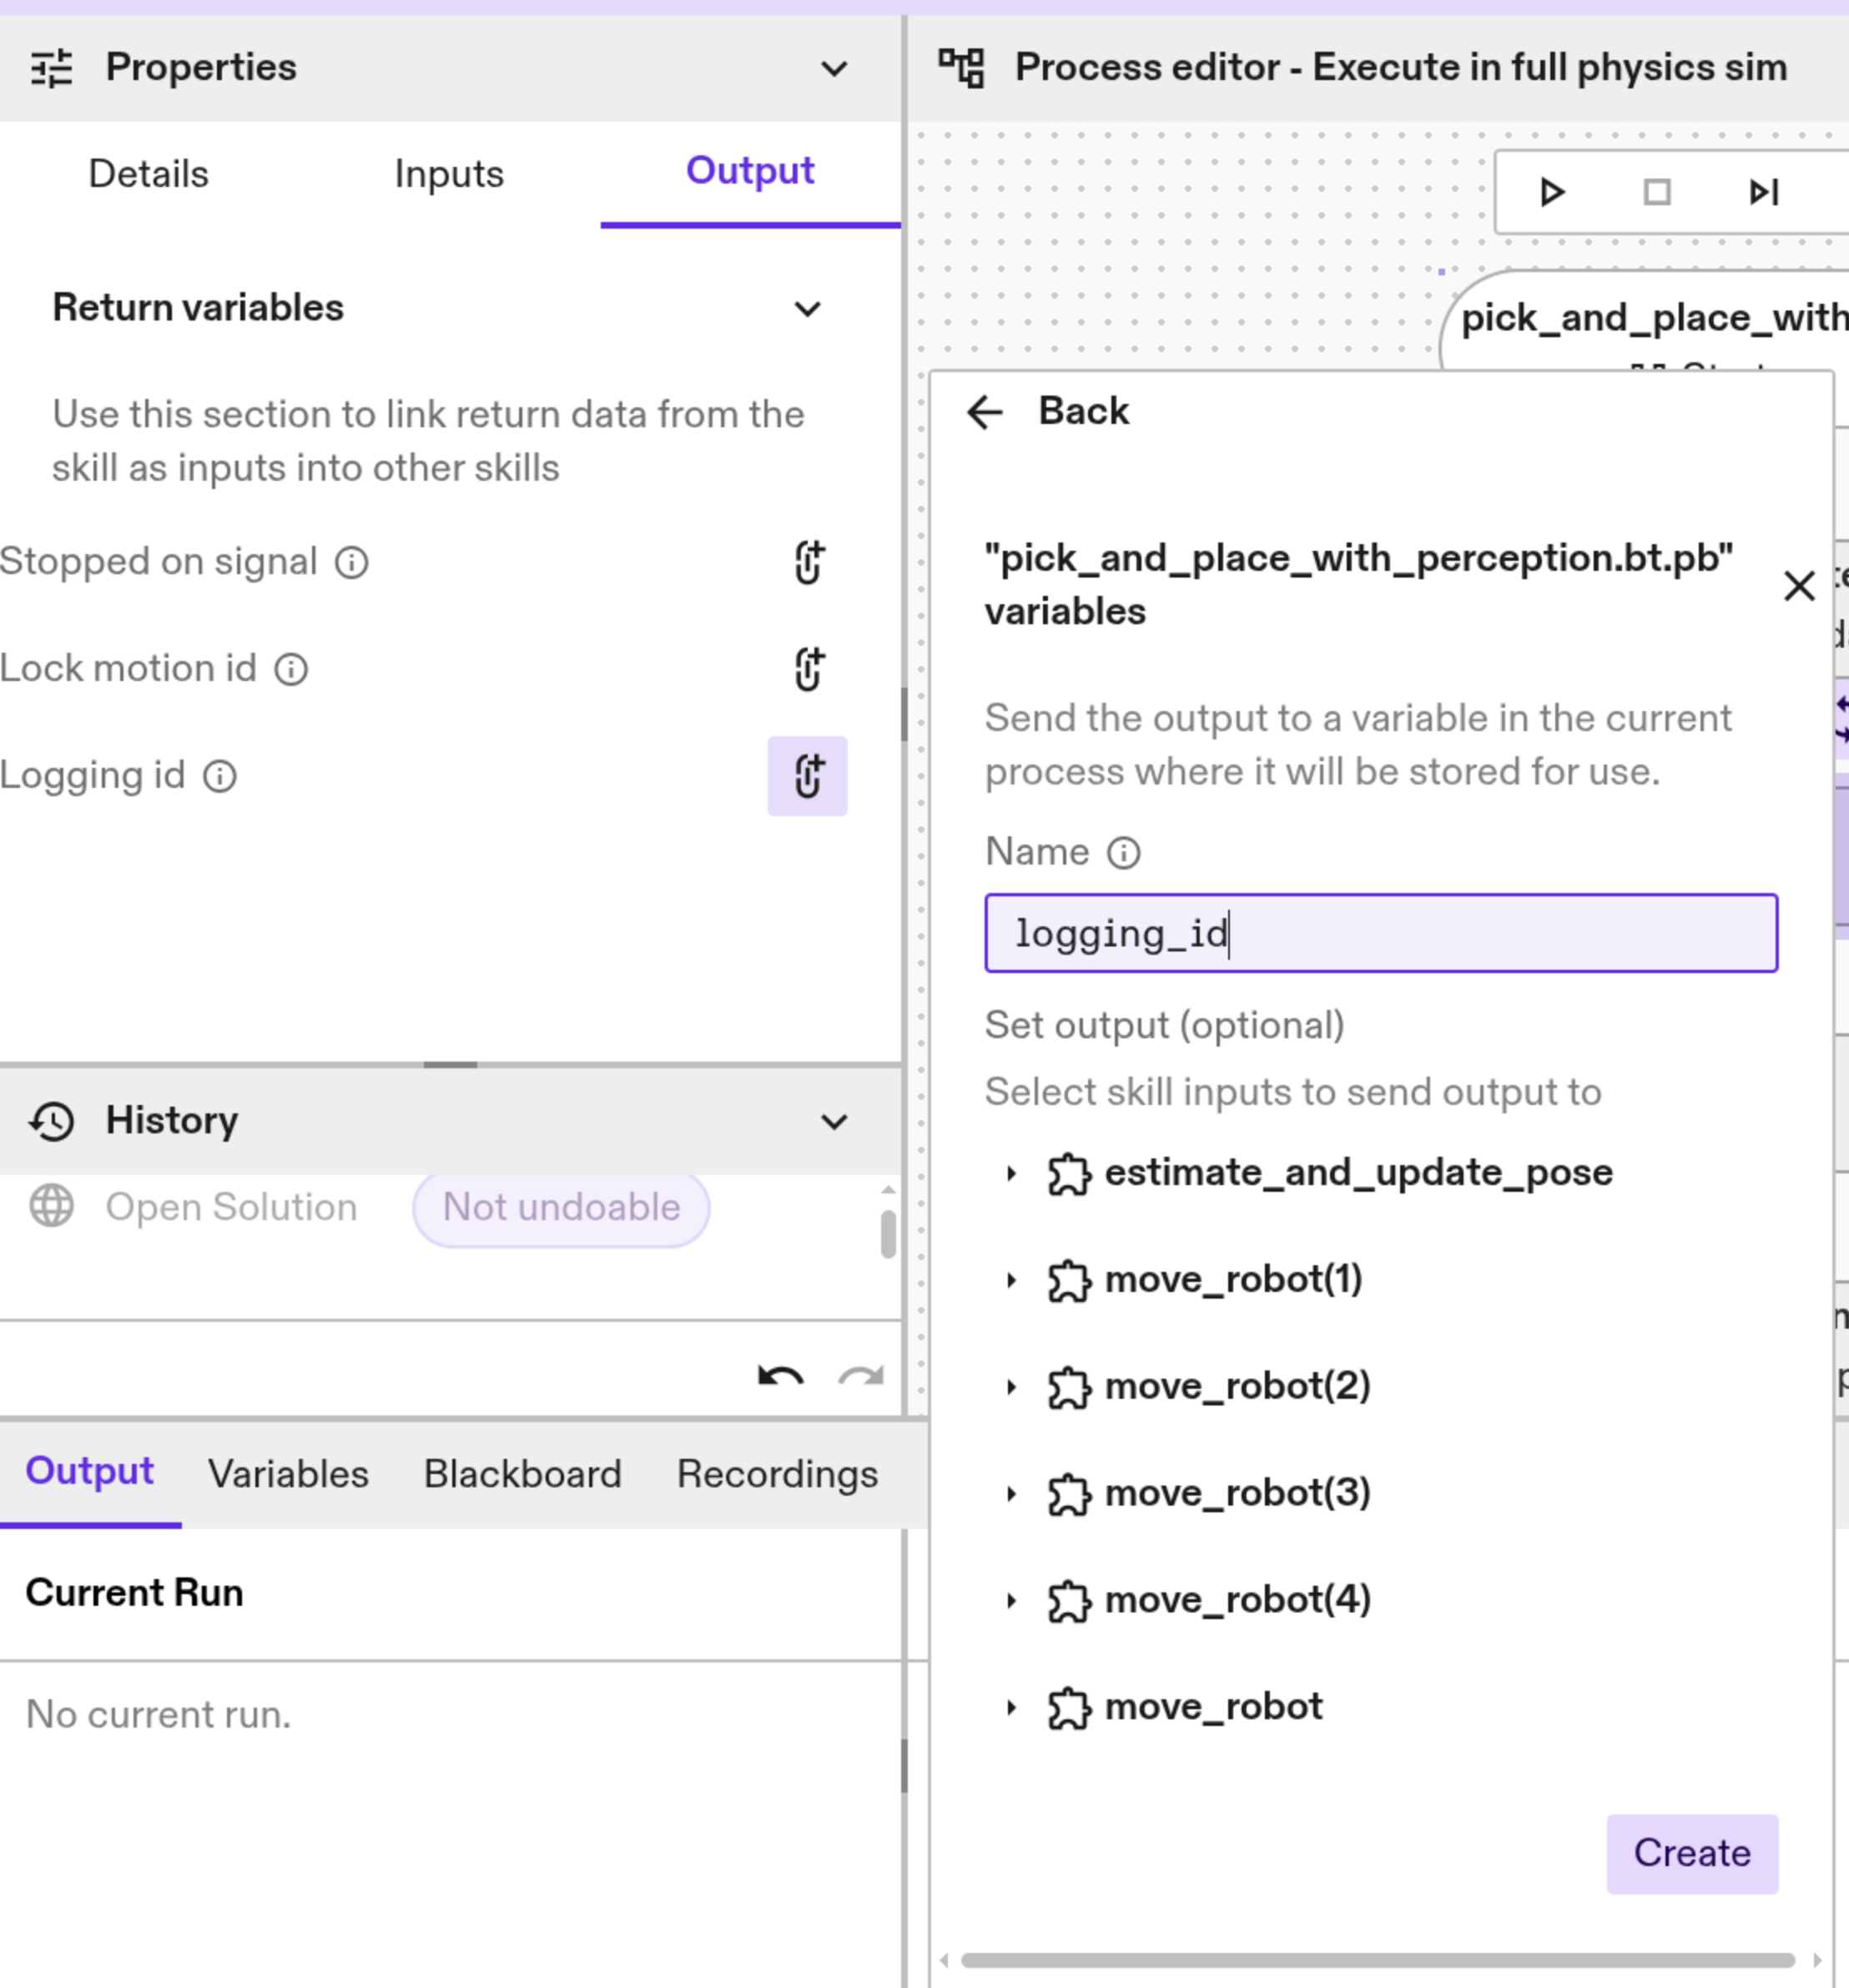
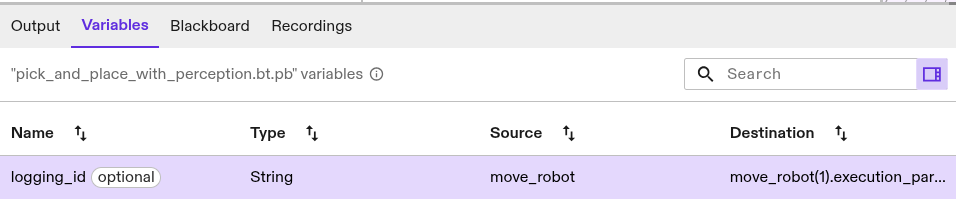
Open the Variables panel to verify that the logging ID and value have been successfully populated after the skill execution.

-
Alternatively, you can look through the text logs to find the logging ID a.k.a. Motion Planning ID.
-
-
Copy a logging ID from the results.
-
It takes a few minutes for any logged data to become accessible on GCS and therefore, to the Motion Planning Inspector. Ensure the logging ID you want to inspect is within the last 12 days, as our data retention is only for this period.
-
Launch the MPI Tool:
- In the Flowstate UI, go to Access Window -> Open Motion Planning Inspector
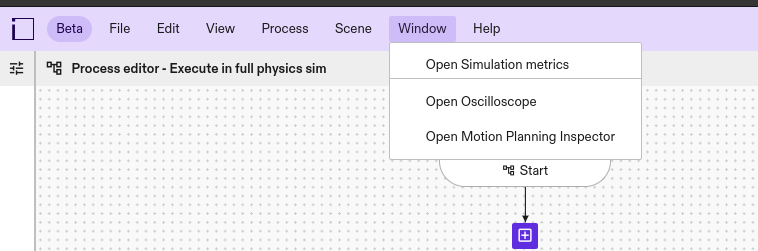
- In the Flowstate UI, go to Access Window -> Open Motion Planning Inspector
-
Load Motion Planning Data:
-
In the MPI dialog, paste the copied logging ID into the Motion Planning ID field.

-
Click the Load button.
-
Wait for the MPI to load the data. Initialization and startup may take a couple of minutes after loading data.
-
The tool only supports logs that were logged within the last 14 days from the current date. This tool needs a healthy internet connection to work as expected.
-
Inspect the Data:
-
Main Window:
Observe the rendered 3D world. This world is an exact snapshot of the world when the motion planning call was made.
- The 3D world is read-only; modifications to the world are not possible.
-
Details Section:
Review the logging ID, date, and time.
-
Controls:
Click the Play Trajectory button to visualize the robot's movement. Click the Reset button to reset the robot arm to the initial state.
-
Input Tab:
Examine the motion segments, constraint types, and constraint information.
-
Output Tab:
Analyze the trajectory waypoints and joint positions.
-
-
Recompute Motion Plan:
The Motion Planning Inspector now allows you to edit input fields and recompute the motion plan. This is useful for debugging and testing how different input parameters affect the robot's trajectory.
-
Edit Input Fields:
In the Input Tab, you can modify the values of the motion segments and constraints.
-
Recompute:
Click the Recompute button to generate a new motion plan using the modified input parameters. The Output Tab will update to show the latest output, and the 3D visualization will reflect the new trajectory.
-
Discard Changes:
If you want to revert your changes and go back to the original input values, click the Discard button.
-