Design a workcell
Flowstate offers a web interface for authoring and visualizing a digital workcell, which is the environment that the robotics solution executes in.
In the Flowstate Scene Editor, you can import or upload digital models of equipment like robots, cameras, and grippers as well as static objects like tables and enclosures. Once added to the solution, place these digital objects in 3D space and make detailed adjustments, including calibration, to precisely match a physical workcell.
A common user flow supported by Flowstate is to first author the digital workcell entirely in simulation, without necessarily installing any equipment. You can use this digital workcell as a guide to construct the physical workcell. Finally, you can come back to Flowstate to configure the digital workcell to more closely match the installed physical workcell.
On the right side of the Scene Editor the Scene Panel shows a tree-view of all the objects in the scene. This panel can be used to select and deselect objects, controls their visibility and editable-state as well as accessing object-specific properties.
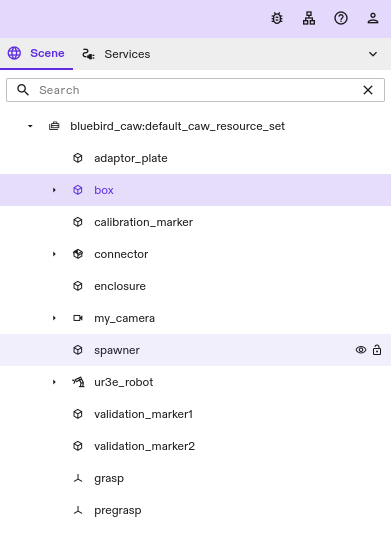
In the Scene Panel hierarchical (parent/child) information between objects is shown by using indentation. In the following image, for example, the ur3eflange is a child of ur3e_robot. ati_ft_sensor and the tool_attach frame are children of the ur3eflange adapter. The flange and sensor frames are also children of ur3e_robot and sibling of ur3eflange.
An object's parent can be changed by dragging the object to another location within the tree-view.

Holding the mouse cursor over an object will display the visibility and lock controls for the corresponding object.

Clicking on the eye icon will toggle the visibility of the object in the scene. Items that have been marked as hidden will be shown with the following icon.

Clicking on the padlock icon will toggle the lock state of the object. Locked objects cannot be edited or moved. This can be useful as a way to prevent accidental edits in a complex scene.

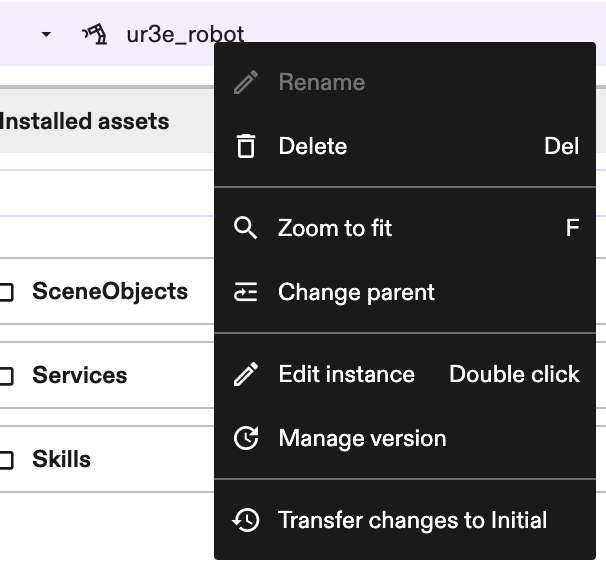
Clicking on an object in this tree-view will select the corresponding object. Right-clicking will open a context menu that offers more low-level control of the object's properties.
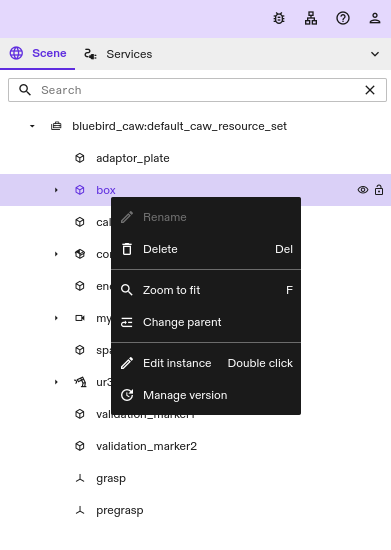
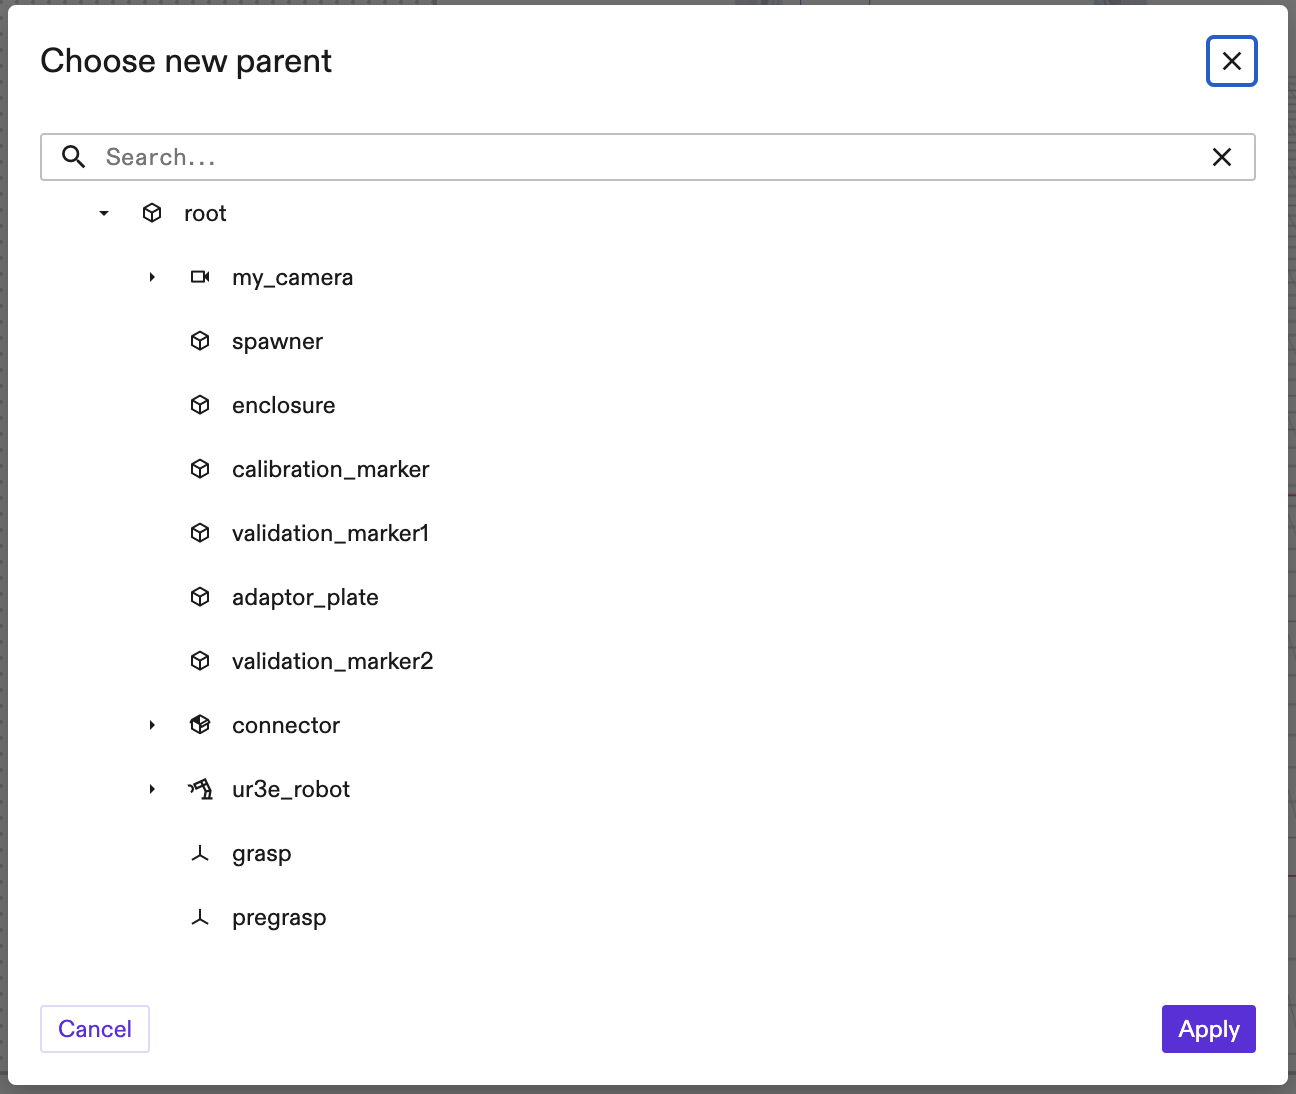
You can also change the parent of the selected object through the context menu by selecting "Change parent" and choosing a new parent in the dialog.
Initial and Execute tabs
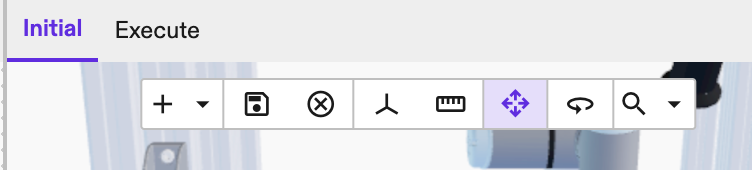
The Scene Editor has 2 tabs: Initial and Execute.
-
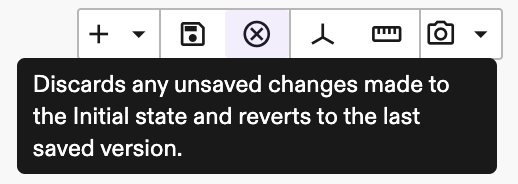
Initial: The initial starting state is intended to be the main editing context for the user, where saving a solution saves that initial state, similar to how you would expect from a text editor. In this tab, the user defines and edits the starting state of the world without needing to start resource heavy services. Only user actions modify the Initial world. Changes are saved exclusively to the Initial world and only when the user explicitly saves. The user can revert to the last saved state by clicking on the Discard Changes button in the tool bar.
-
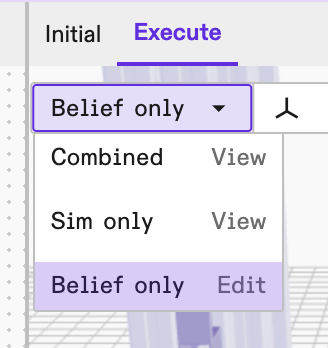
Execute: This tab describes the changes happening to the workcell when a process is called or a service is invoked. This is how Flowstate understands the physical relationship(s) within the workcell. The Execute tab has a dropdown which lets the user understand the different contexts - Belief, Sim and Combined.
Three view modes (Execute tab when running in simulation):
|
|
Reset to initial
When on the Execute mode, the user can make edits to the belief world. These changes are reflected in the Execute tab and make it different from the Initial world. When running a process, the robot position or objects may change, making them different from the Initial world.
The Reset to Initial button in the Execute tab, resets the Execute tab to the Initial world so that there are no differences.

When running on real hardware, users will be prompted with two options:
- Use Initial State: This resets the world in the Execute tab to match that of the Initial tab, and will move the actual robot to do so.
- Use Initial State without moving robots: This option will reset everything in the Execute tab to match that of the Initial tab, but will leave any hardware connected to a robot controller in place. In general this means that physical robots will not move.
Transfer changes
When in the Execute tab, the user can make edits to the belief world. These changes make the world reflected in the Execute tab different from those in the Initial tab. When running a process, the robot position or other object positions may change. This again makes it different from the Initial world. Additionally some actions like Jogging are only accessible via the Execute tab.
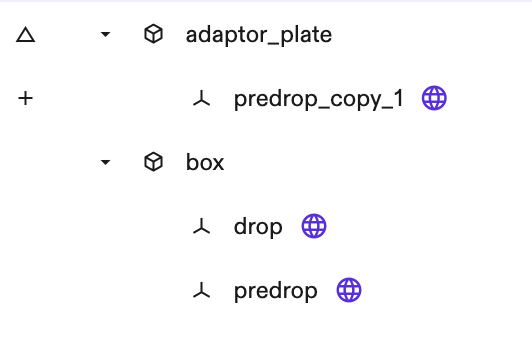
When there are differences between the world in the Initial tab and the world in the Execute tab, they are displayed using status indicators in the world tree. An object or frame marked with a (+) icon exists in the Execute tab's world but is absent from the Initial tab. Conversely, a triangle icon indicates an object or frame present in both worlds but with modifications in the Execute tab.
The following example demonstrates a predrop frame that has been duplicated
and reparented to the adaptor_plate object. The newly created frame will be
marked with a (+) symbol, and the adaptor_plate will be marked as modified.
The Transfer changes to Initial option can help transfer the selected
changes back to the Initial world so that they can be saved. This option can
be accessed by right clicking the menu of objects in the world
tree on the Execute tab. This includes changes due to reachability, jogging,
changes due to frame teaching, tcp calibration etc. Note that this is only
available in the Execute tab. In order to transfer changes from the Initial
tab to the Execute tab, use the Reset to Initial button.
History Panel
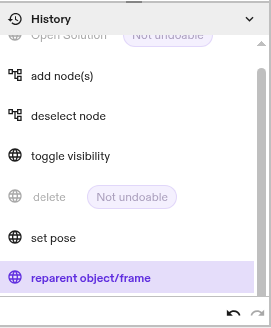
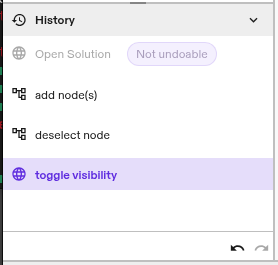
The History panel, found at the bottom of the Properties panel on the left side of the FlowState UI, displays a list of actions performed within the FlowState Scene Editor and the Process Editor. It actively tracks the the solution's undo/redo stack, with the most recent action appearing at the bottom and highlighting the action that will be undone by the next undo operation.
In the following example, after opening the solution, the user created a behavior tree node, deselected it, and toggled visibility on a scene item. Selecting Undo from the Edit menu, or pressing Ctrl+Z would undo the toggle visibility operation.
Details about each entry in the History panel list can be accessed by holding the mouse over an action.
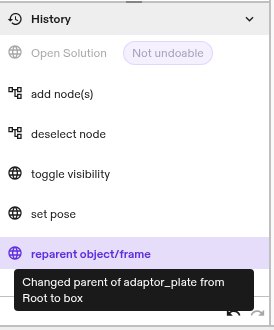
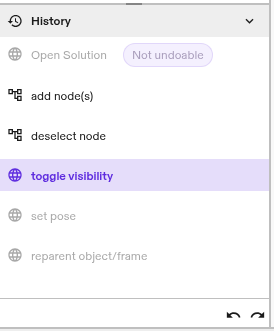
The arrows at the bottom of the History panel can be used to undo and redo operations. In this example the user decided to undo a reparenting operation and post change operation. Clicking the left arrow would undo the highlighted toggle visibility command, while clicking the right arrow would redo the set pose action.
Operations that are not undoable, such as deleting frame hierarchies or deleting objects, will appear in the History panel's command list as greyed-out items tagged as 'Not undoable' and will be skipped over during undo/redo operations.