Add control flows
Control flow nodes help you structure your skills in different ways, allowing you to achieve a range of behaviors. For more information about the node types, see the Behavior tree node types.
Parallel
Clicking the Parallel option will result in an added node looking like this:

You can add as many children as you want, all branches will be executed in parallel and each branch can consist of any number of skills and nested control structures. The semantics are the same as creating a Parallel node in code.
Selector
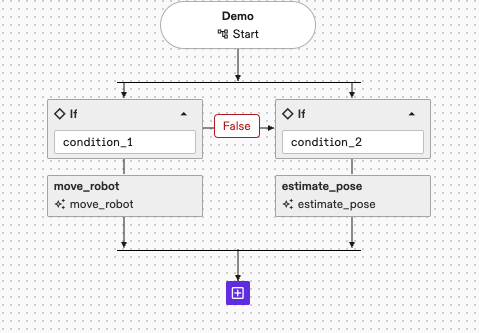
Clicking the Selector option will result in an added node looking like this:
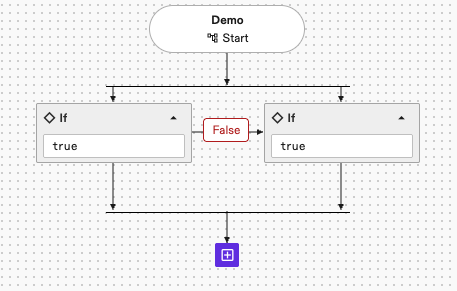
You can add as many children as you want which will be tried in order. Each child branch has a condition attached, which determines if the child node will be executed. Once a condition succeeds, the corresponding child is executed, causing the selector node to exit with the result of that node. No further child branches are evaluated or executed. Each branch can consist of any number of skills and nested control structures. The semantics are the same as creating a Selector node in code.
Clicking on the selector node opens its conditions in the details panel; these are initially set to always succeed.
Here you can modify the conditions under the Branches header using the condition editor or by adding a Common Expression Language (CEL) expression under "Edit via code".
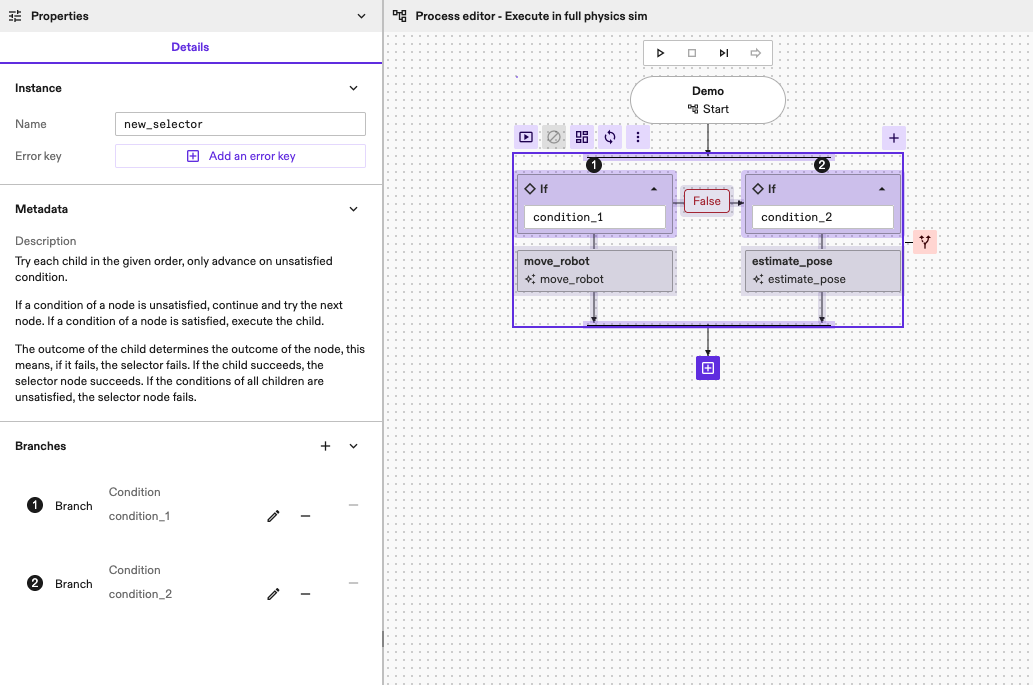
The conditions and decorators sections provides more information on how to fill it, specifically the section on blackboard conditions.
Group
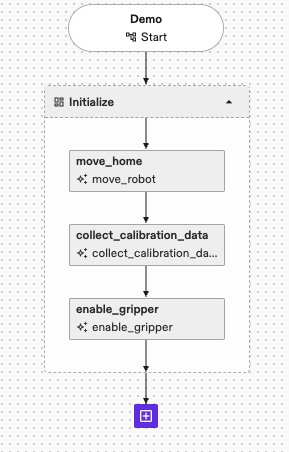
Adding a Group node allows you to group parts of your program together, collapse it for better readability and name it. After adding a group node, you should see this:

Clicking on the header of the node will enable you to set a name for the group. You can add as any number of skills and nested control structures. The semantics are the same as creating a Subtree node in code.
Branch
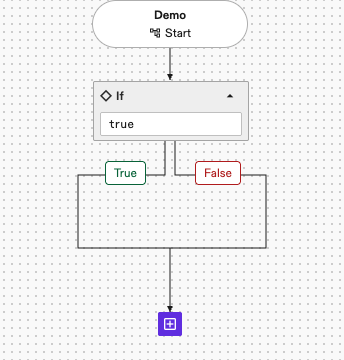
Adding a Branch allows you to execute parts of your program conditionally. You
can specify a condition and depending on the evaluated value a specific program
path will be executed. After adding a new branch, you should see it added
with a condition which always evaluates to true and no children:
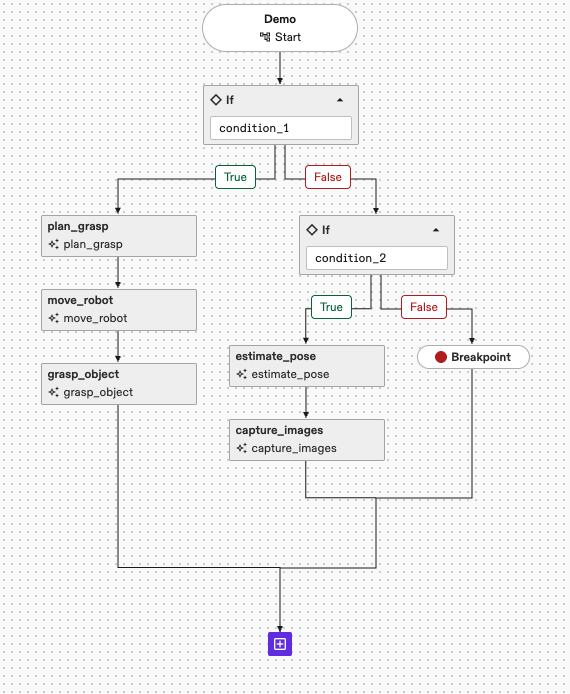
You can add any number of skills and nested control structures on either path of the branch. The semantics are the same as creating a Branch node in code.
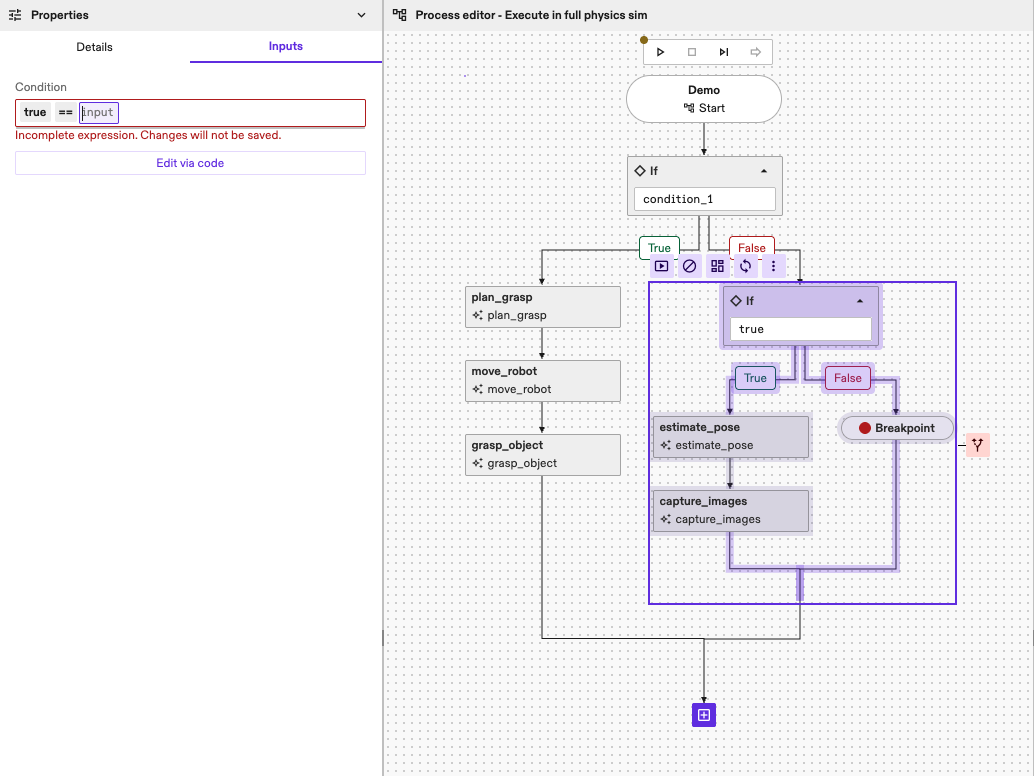
Clicking on the condition allows you to edit the condition.
Loop
Adding a Loop allows you to execute parts of your program multiple times. Next to a maximum iteration you can also specify a condition and depending on the evaluated value the program part will continue to loop or move on. After adding a new loop, you should see it added as an infinite loop:
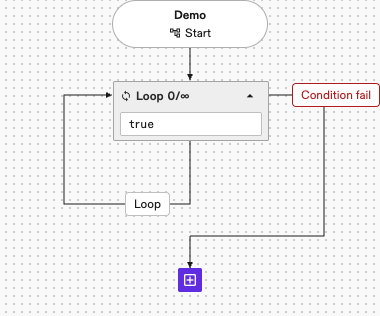
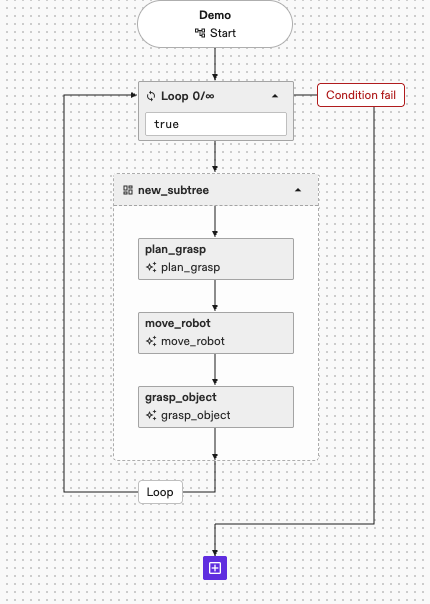
You can add any number of skills and nested control structures. The semantics are the same as creating a Loop node in code.
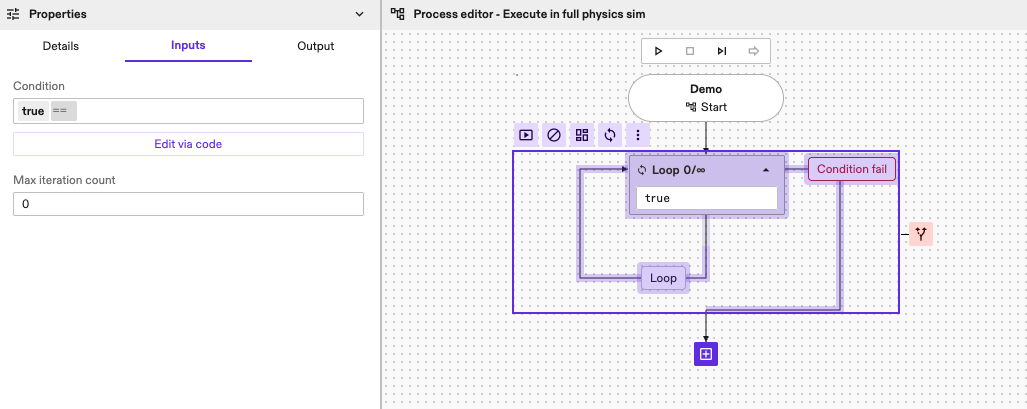
Clicking on the condition allows you to edit the condition and maximum iteration count.
Retry
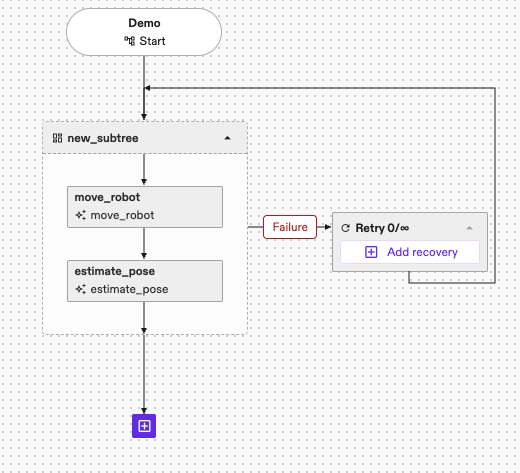
Adding a Retry node allows you to retry executing parts of your program multiple times until it succeeds, or fail after a specified number of retries. After adding a new retry node, you should see it added as an infinite retry, meaning it will only continue once the children execute successfully:
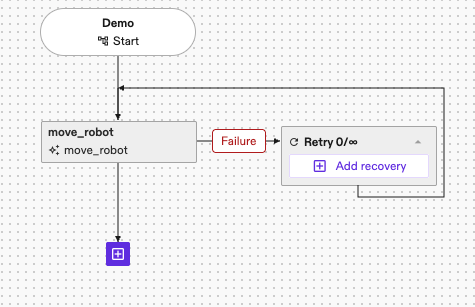
You can add any number of skills and nested control structures. The semantics are the same as creating a Retry node in code.
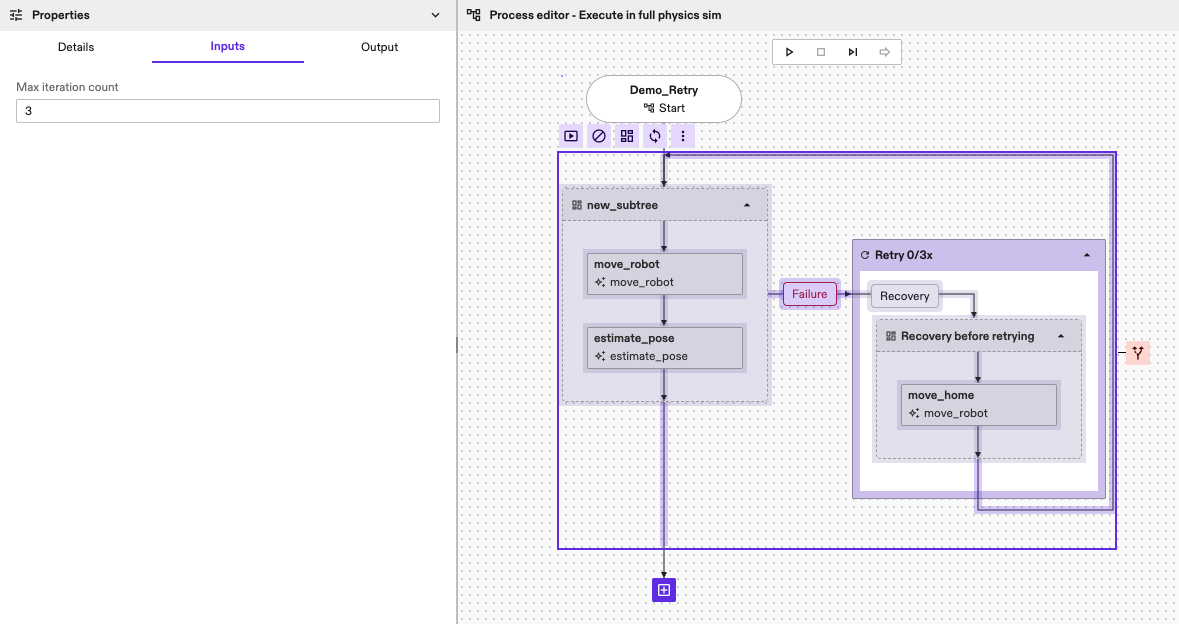
Clicking on the node allows you to edit the maximum iteration count.
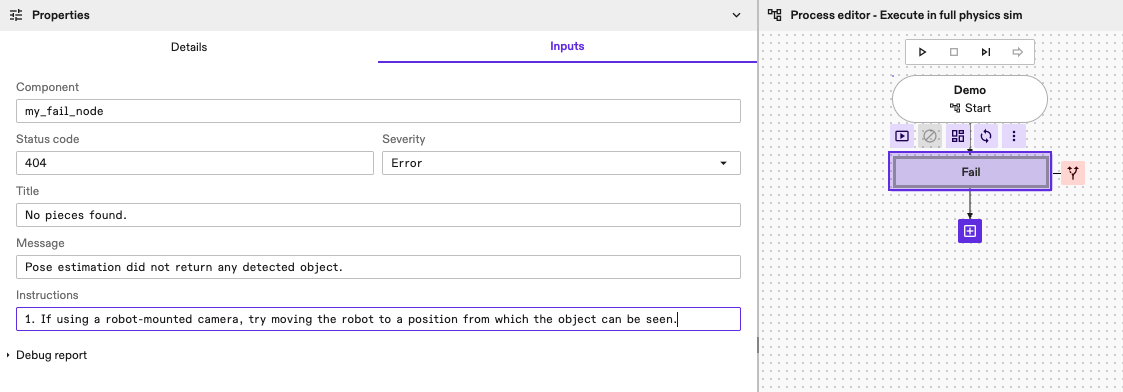
Fail
Adding a Fail node allows you to purposely fail the execution of the process and set a user-defined extended status message.
The semantics are the same as creating a Fail node in code.
Fallback
Handling Failures and Implementing Recovery
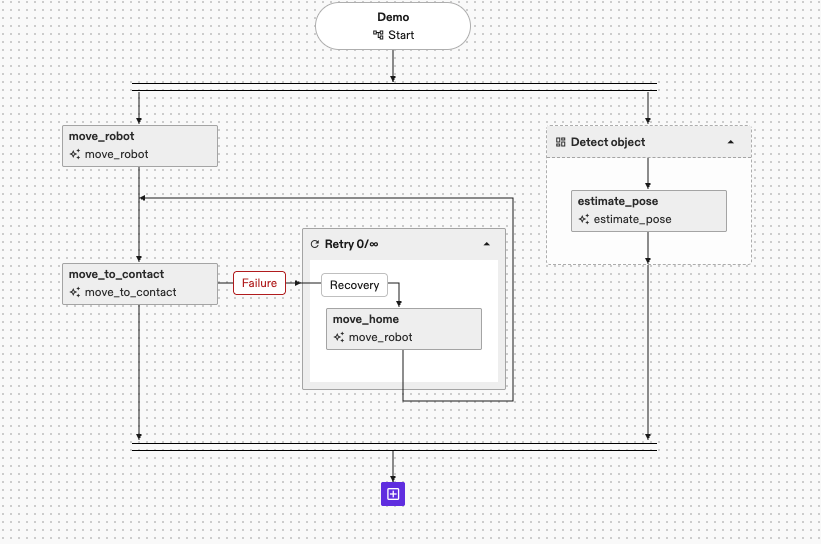
The Fallback node is a crucial control flow element for robust process design. It allows you to define alternative actions or recovery strategies when a preceding part of your process fails. Essentially, it tries a sequence of child behaviors (fallback branches) until one succeeds, or until all defined fallback behaviors have also failed.
You can add a Fallback node by selecting the node you want to cover with the fallback behavior. This can be a single skill, but also groups and other control nodes. To create a fallback node, click the fallback icon that is visible to the right of the selected node and then click Fallback.
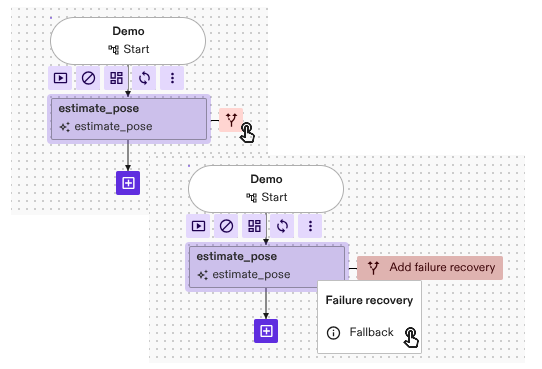
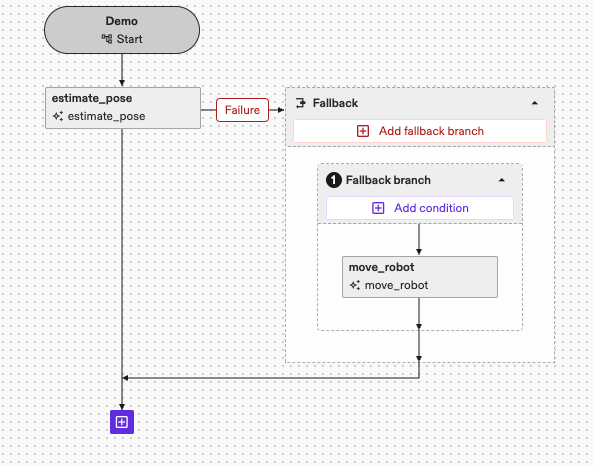
- When you first add a Fallback node, or when you add a new branch to an existing one, it often creates an empty Group node as a child. This Group node serves as a container for your specific fallback behavior. This Group node allows you to add as many skills and nested control structures as needed to define a complete recovery action or alternative approach.
- You can add multiple such fallback branches to a single Fallback node. They will be attempted sequentially upon failure of the previous one.
How it Works
When a Fallback node is activated (typically after a failure in the nominal flow):
- It immediately enters a
Runningstate. - It executes its fallback branches in the order they are defined.
- If a fallback branch succeeds, the Fallback node itself succeeds, and no further children are executed.
- If a fallback branch fails, the Fallback node proceeds to the next fallback branch in sequence.
- If all fallback branches fail, the Fallback node itself fails.
Conditional Fallback Branches using Extended Status
While the Fallback node itself tries its fallback branches sequentially on failure, you
can make the execution of these individual fallback branches conditional. This
is particularly powerful when combined with ExtendedStatus information written
to the Blackboard by the skill or node that originally failed.
-
Capturing Error Information: Configure the skill, node or group of nodes that might fail (and thus trigger the Fallback node) to write its
ExtendedStatusto a specific error key upon failure. This is automatically done for the nominal flow of any Fallback node and can be manually inspected or modified from the "Details" tab, where you can specify anError keyfor the extended status of the node.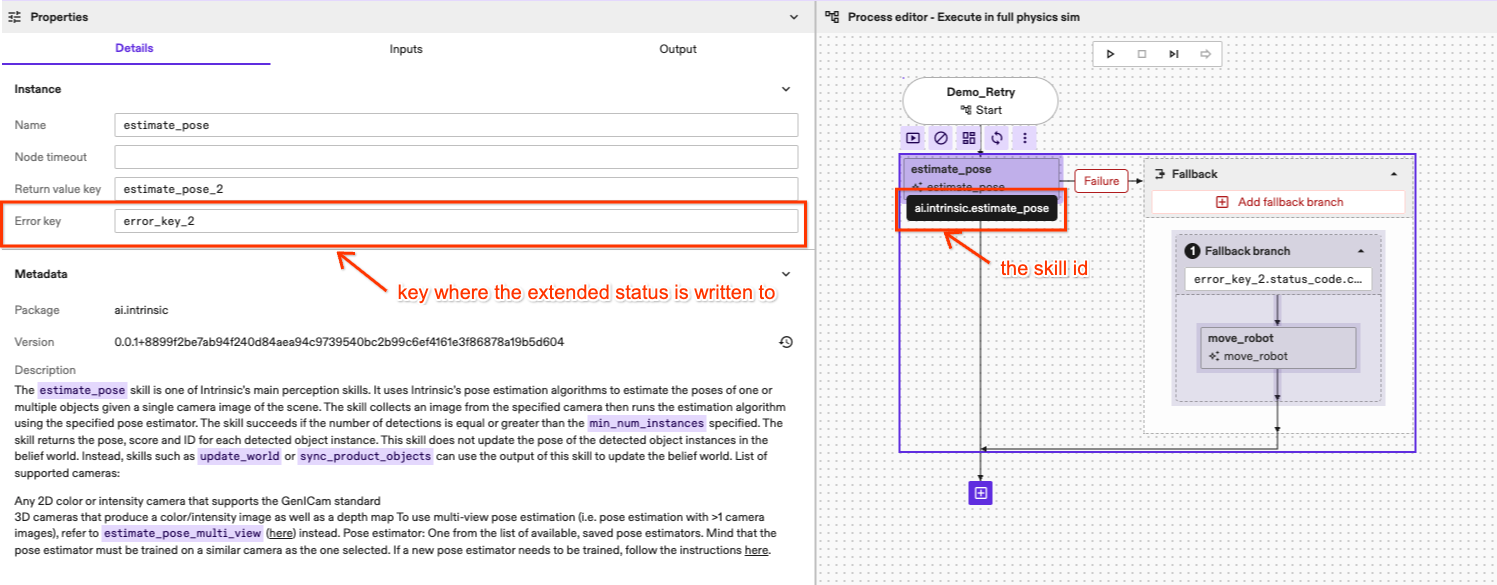 tip
tipConsider implementing a centralized error handling strategy. You don't need an error key for every node in the nominal flow of the Fallback node.
ExtendedStatusinformation automatically propagates up the behavior tree from a failing child node to its parent nodes. If the nominal flow can contain other nodes (like aRetryor aParallel), it will wrap theExtendedStatusreceived from its failing children. -
Using Error Information in Conditions: Each fallback branch can have a Condition. This condition can reference the error key where the
ExtendedStatuswas stored. You can use Common Expression Language (CEL) in the condition to check the specificcomponentandcodeof theExtendedStatus. This allows you to "branch out" and select a specific recovery strategy tailored to the exact error that occurred.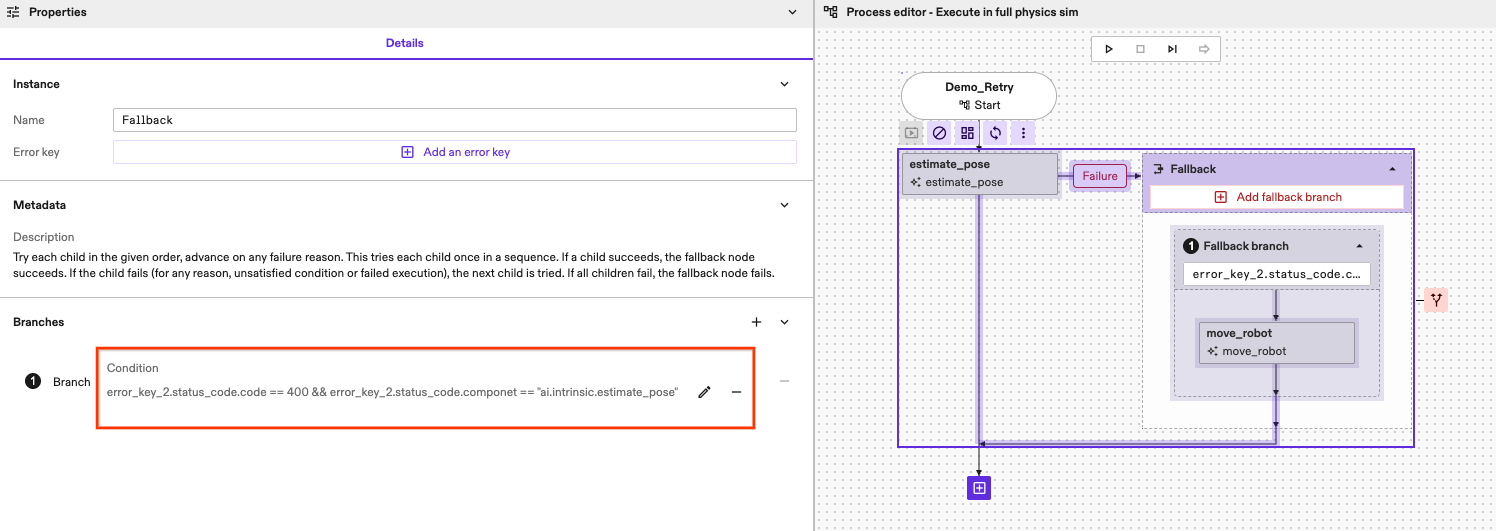
Example Condition: If
move_to_contact(with skill IDai.intrinsic.move_to_contact) fails and writes its status toerror_key_1, a condition on a fallback branch might look like:error_key_1.status_code.component == "ai.intrinsic.move_to_contact" && error_key_1.status_code.code == 10301This would ensure this specific fallback branch only runs ifmove_to_contactfailed with code10301(e.g., "Stabilization timeout" as per the skill's manifest).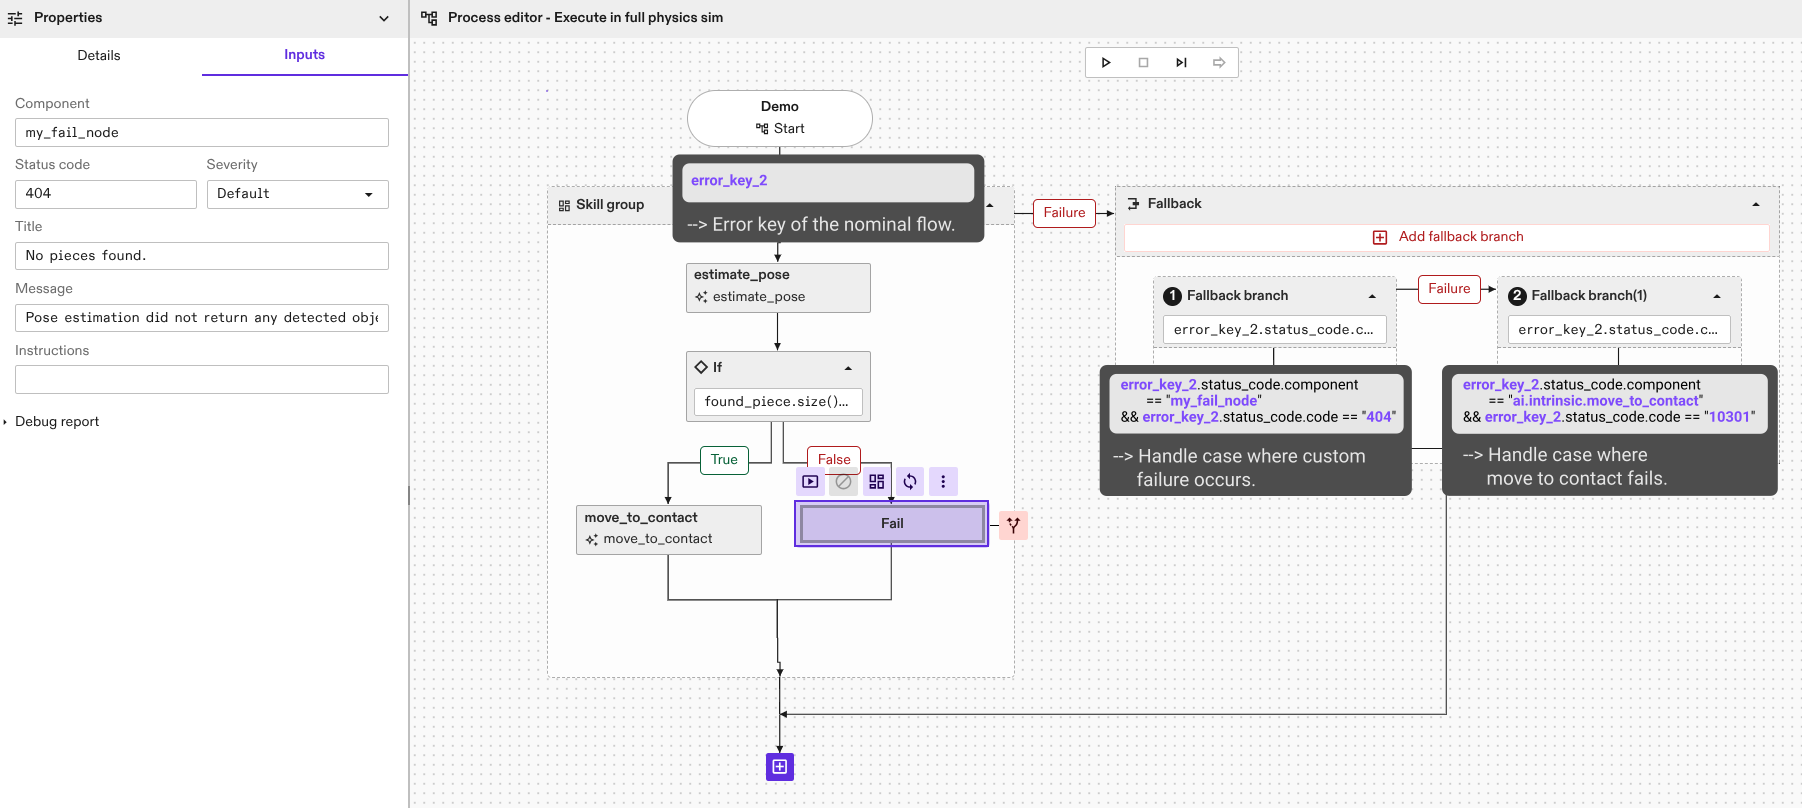
By using Fallback nodes, especially with conditional logic based on ExtendedStatus,
you can create more resilient and intelligent robotic solutions that can gracefully
handle a variety of failure scenarios. The semantics in the UI are consistent
with creating a Fallback node node programmatically
using the Solution Building Library (SBL).