Local environment
This guide shows you how to set up an Intrinsic development environment on your computer.
System requirements
To set up a development environment, your system must meet the following requirements:
| Item | Description |
|---|---|
| Operating System | Ubuntu 18.04 (LTS), 20.04 (LTS), 22.04 (LTS), 22.10, 23.02, or 24.04 (LTS). -or- Windows 10 or Windows 11, either Professional or Enterprise edition. |
| Disk space | At least 20GB of available disk space. |
| Processor | i7 processor or equivalent, with at least 16GB of RAM. |
For additional setup options, review the system requirements for dev containers.
Once you have verified that your system meets the minimum requirements, proceed with the following sections that describe how to install several required software packages.
Install the Docker runtime
- Ubuntu
- Windows
First, enable installation from the Docker repository by running the following command:
sudo apt-get update &&
sudo apt-get install ca-certificates curl gnupg &&
sudo install -m 0755 -d /etc/apt/keyrings &&
curl -fsSL https://download.docker.com/linux/ubuntu/gpg | sudo gpg --dearmor -o /etc/apt/keyrings/docker.gpg &&
sudo chmod a+r /etc/apt/keyrings/docker.gpg &&
echo \
    "deb [arch="$(dpkg --print-architecture)" signed-by=/etc/apt/keyrings/docker.gpg] https://download.docker.com/linux/ubuntu \
    "$(. /etc/os-release && echo "$VERSION_CODENAME")" stable" | \
    sudo tee /etc/apt/sources.list.d/docker.list > /dev/null
Next, install the required Docker packages:
sudo apt-get update &&
sudo apt-get install docker-ce docker-ce-cli containerd.io docker-buildx-plugin docker-compose-plugin
To allow the current user to run docker without sudo (recommended), add
the user to the docker group by running the following command:
sudo usermod -aG docker $USER
Next, log out and log back in order for the group change to take effect. If you are running Linux in a virtual machine (VM), you may need to restart the VM. You can find more information in the post installation guide for Docker.
Validate your installation by running the following command:
docker run hello-world
If you encounter issues with any of the previous steps, you can find a full list of installation steps with explanation on the official Docker documentation site.
For the best experience, install Docker desktop v 4.20 or newer.
-
Download the Docker Desktop installer for Windows.
-
After download finishes, run the installer.
noteWe recommend you use the WSL 2 backend as it provides better performance. If your administrator does not allow WSL 2, clear the option. You may be prompted to install the WSL engine. If yes, follow instructions to do so.
-
After installation finishes, start docker desktop to accept the license and initialize your docker environment. You don't need to install additional extensions to your Docker desktop.
You can find the complete installation guide for Docker Desktop here.
You can find additional information in the FAQ or in the Troubleshooting guide. Refer to these documents if you have problems installing or running the Docker Desktop.
Docker Desktop: Access Denied!
Read the FAQ article to resolve, or open a PowerShell
command window as Administrator and run
net localgroup docker-users "your-windows-user-id" /ADD to add
yourself to the docker-users group. You need to log out and log back in
for changes to take effect.
Install Visual Studio Code
-
Download and install VS Code from one of the official distribution channels.
-
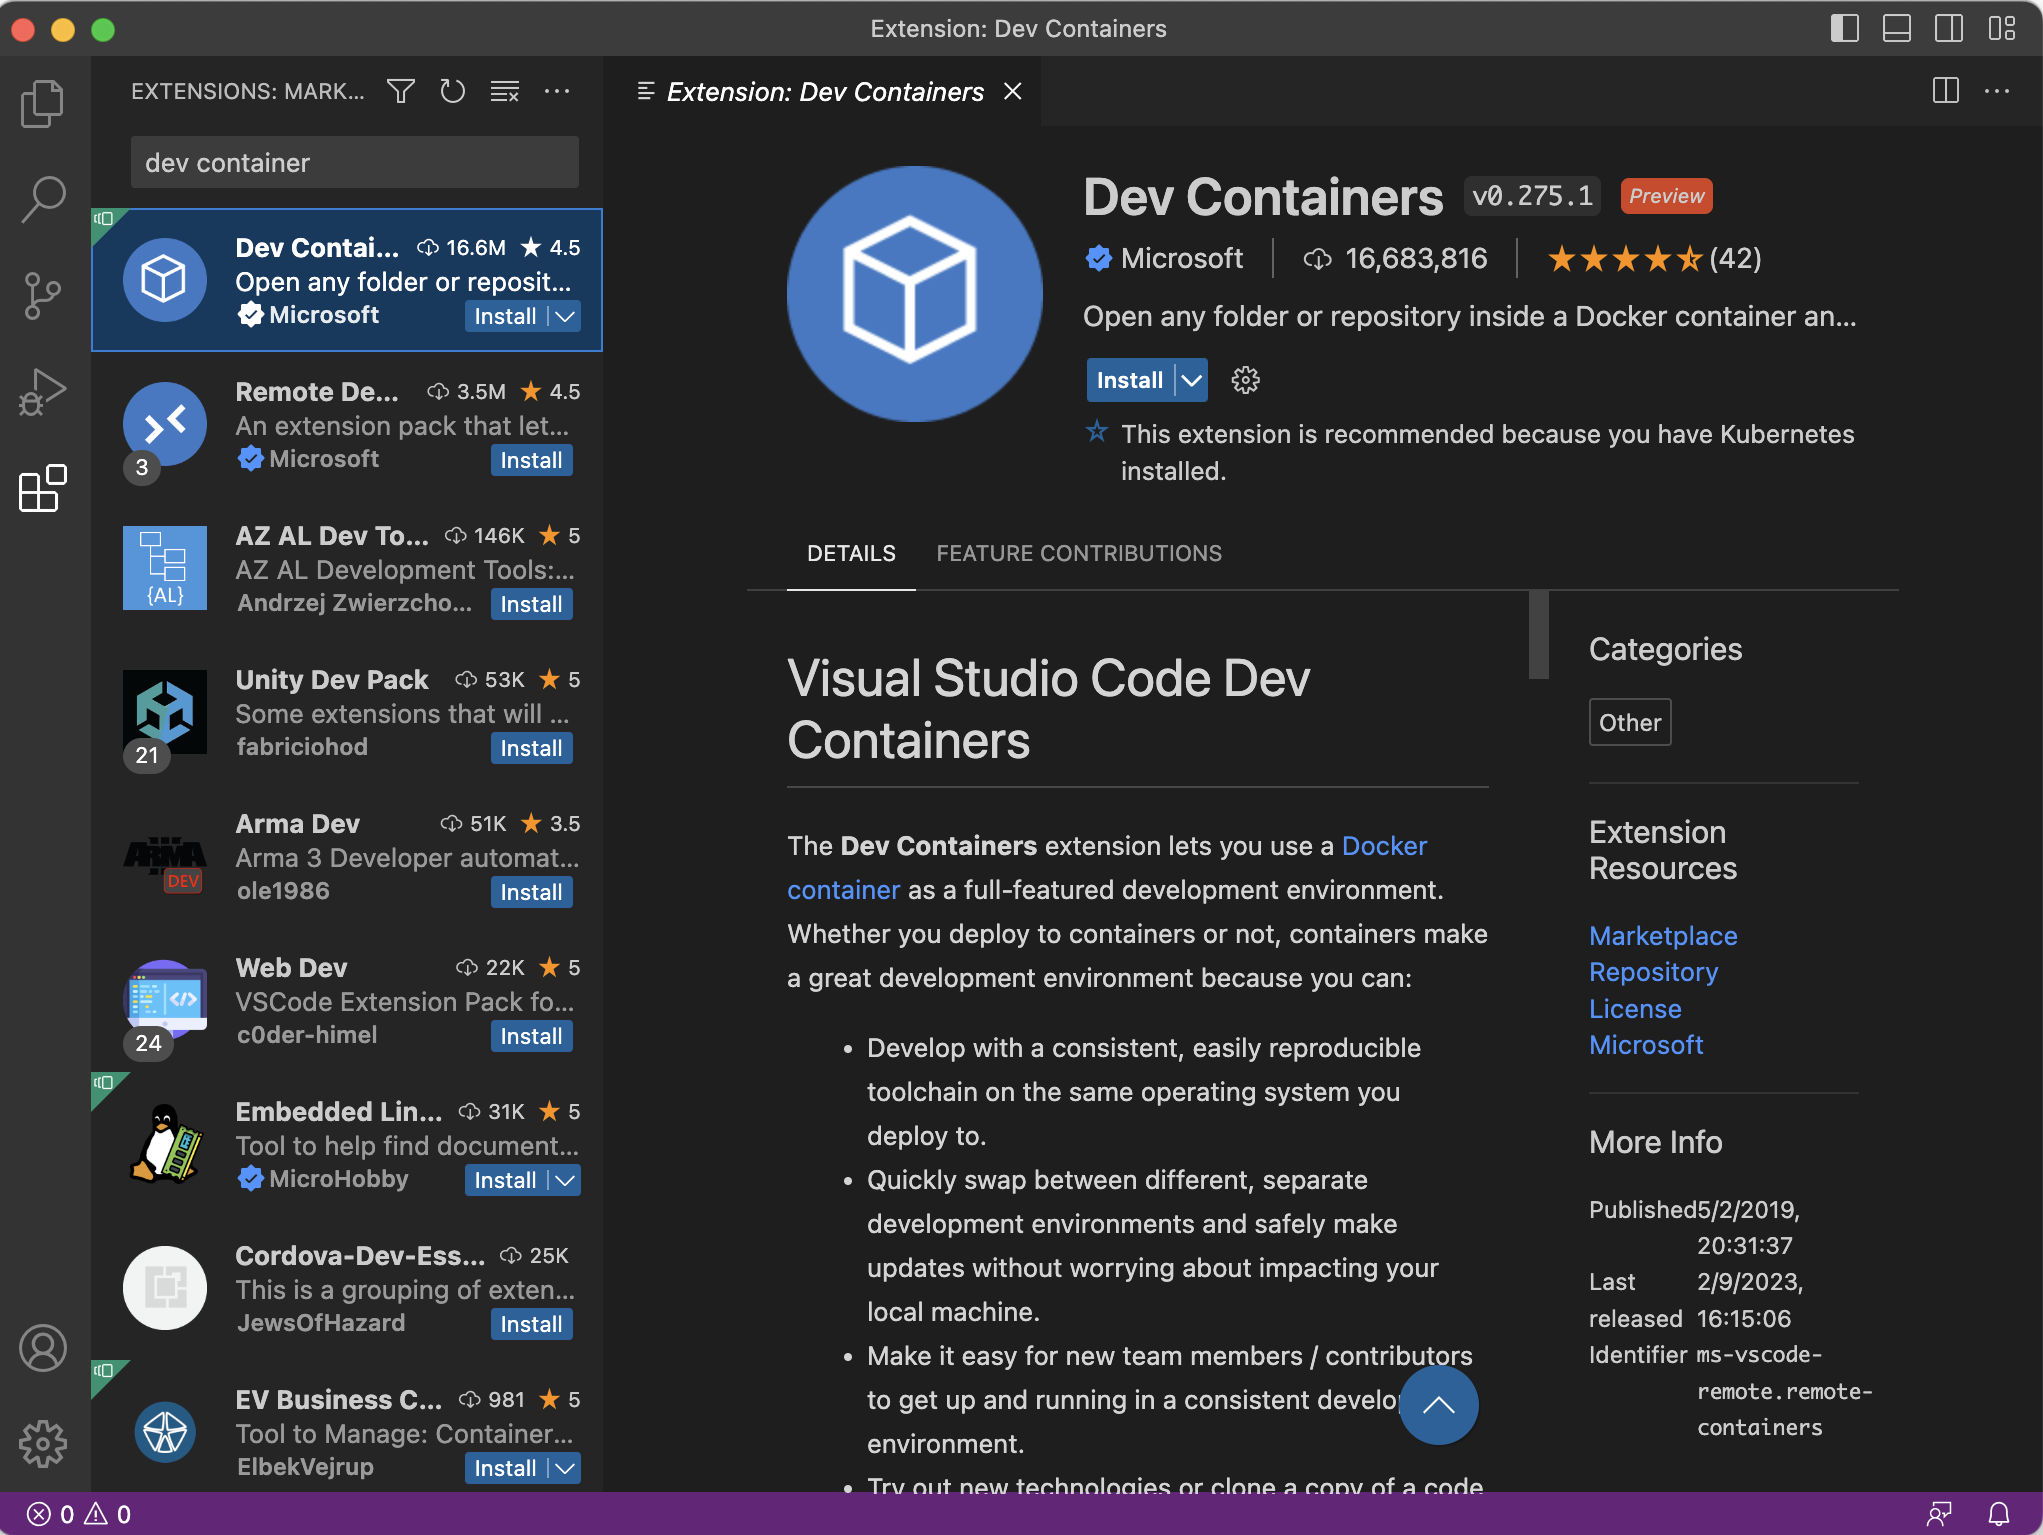
Install the Dev Containers extension for VS Code.
You can install the extension directly from inside VSCode by executing the following steps:
- Click the Extensions icon on the left ribbon panel
- Enter "Dev Containers" in the "Search Extensions in Marketplace" search bar
- Install the Dev Containers extension as shown in the following screenshot:
(Optional) Install the GitHub CLI
Git or the GitHub CLI may be needed to perform some tasks, such as downloading example Intrinsic source code from a GitHub repository. If you don't have git or the GitHub CLI installed, continue with the following instructions:
- Ubuntu
- Windows
If you're using one of the recommended Ubuntu versions, you can use the following commands :
To install git :
sudo apt install git
To install GitHub CLI :
type -p curl >/dev/null || (sudo apt update && sudo apt install curl -y)
curl -fsSL https://cli.github.com/packages/githubcli-archive-keyring.gpg | sudo dd of=/usr/share/keyrings/githubcli-archive-keyring.gpg \
&& sudo chmod go+r /usr/share/keyrings/githubcli-archive-keyring.gpg \
&& echo "deb [arch=$(dpkg --print-architecture) signed-by=/usr/share/keyrings/githubcli-archive-keyring.gpg] https://cli.github.com/packages stable main" | sudo tee /etc/apt/sources.list.d/github-cli.list > /dev/null \
&& sudo apt update \
&& sudo apt install gh -y
You can download git for windows from the git-scm project.
The GitHub CLI is available using package managers like WinGet, scoop, Chocolatey, Conda, and is also available as a downloadable MSI. You can download the latest release from the releases page.
After the installation completes, open a new terminal and run
gh auth login to authenticate with your GitHub account and answer the prompts
on the screen.
Provide the following answers to the questions:
? What account do you want to log into? GitHub.com
? What is your preferred protocol for Git operations? HTTPS
? Authenticate Git with your GitHub credentials? No
? How would you like to authenticate GitHub CLI? Login with a web browser
After gathering the answers to the questions, the GitHub login process outputs an
eight-digit alphanumeric code that you will use to authenticate your device.
For example, if the generated code was YOUR-CODE, the prompt will look like this:
! First copy your one-time code: YOUR-CODE
Press Enter to open github.com in your browser...
Press Enter to open a page on GitHub and enter the provided code.
Open a project
- Ubuntu
- Windows
To create a project on your local Linux machine, start with creating an empty folder, which represents root of your new project.
-
Open a terminal of your choice
-
Create empty folder representing your project and enter it:
mkdir $PROJECT_NAME
cd $PROJECT_NAME -
Create the Devcontainer configuration:
mkdir .devcontainer
cat <<EOF >.devcontainer/devcontainer.json
{
    "name": "intrinsic-flowstate-devcontainer",
    "image": "ghcr.io/intrinsic-ai/intrinsic-dev-img:latest",
    "runArgs": ["--network=host"],
    "customizations": {
        "vscode": {
            "settings": {
                "intrinsic.defaultSdkRepository": "https://github.com/intrinsic-ai/sdk.git"
            }
        }
    }
}
EOF
Exit your editor to continue
To create a project on your local Linux machine, start with creating an empty folder, which represents root of your new project.
-
Open Command Prompt program
-
Create empty folder representing your project and enter it:
mkdir $PROJECT_NAME
cd $PROJECT_NAME -
Create the Devcontainer configuration:
mkdir .devcontainer
cat <<EOF >.devcontainer/devcontainer.json
{
    "name": "intrinsic-flowstate-devcontainer",
    "image": "ghcr.io/intrinsic-ai/intrinsic-dev-img:latest",
    "runArgs": ["--network=host"],
    "customizations": {
        "vscode": {
            "settings": {
                "intrinsic.defaultSdkRepository": "https://github.com/intrinsic-ai/sdk.git"
            }
        }
    }
}
EOF
Exit notepad to continue.
Open VS Code and use the Open Folder in Container command from the Command Palette (View | Command Palette) to open your project folder.
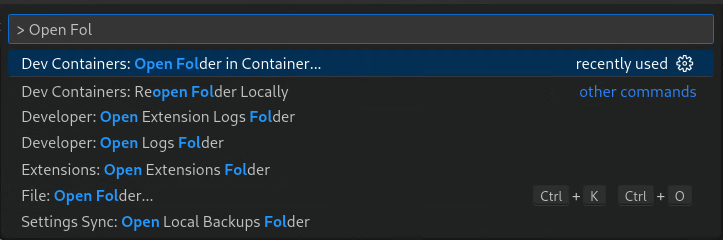
VS Code reuses its current window to open the selected folder in a container created from the image in the configuration. Depending on your internet connection speed it can take some time to download the image to your local computer.
VS Code automatically installs all required extensions for the Intrinsic platform during this process. No manual installation is necessary.
Make sure that you have at least 20GB of free disk space. The free space is required for the build cache that is created in the dev container during builds. If your system runs out of disk space, Docker can behave unpredictably and your dev container might crash.
Troubleshoot Common Issues with inctl doctor
If you are having issues with your local development environment, you can use the inctl doctor command to help diagnose common issues or generate a report that can help support diagnose your issue more quickly.