Intrinsic parameter calibration
When an RGB camera takes an image of the world, it creates a 2D representation, the image, of the 3D world in its view. This projection depends on the camera's physical properties, for example the focal length of its lens and the size of each pixel on the sensor. Every lens also has some distortion. These properties are estimated during an intrinsic camera calibration.
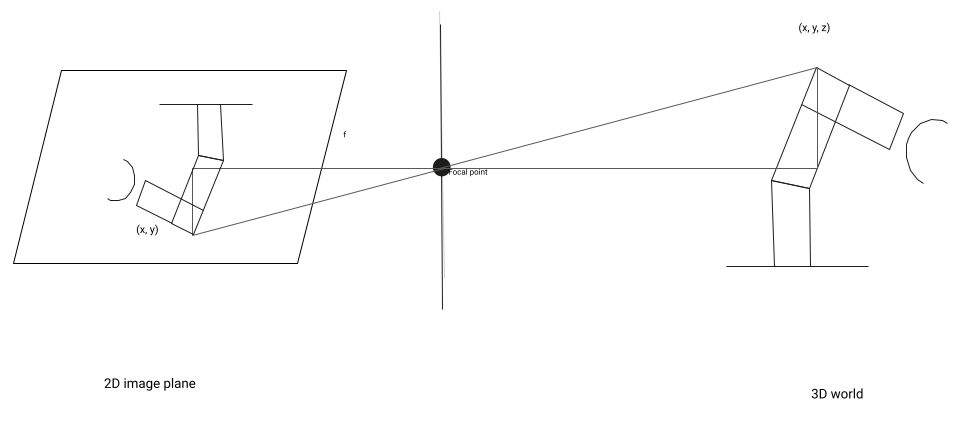
To estimate the DOF (Degree of Freedom) pose of an object from RGB images, projection parameters must be estimated. These parameters, as well as the lens distortion, are estimated during an intrinsic camera calibration. In order to obtain an accurate pose estimate from an RGB image, it is important to estimate the intrinsic camera parameters accurately.
Some cameras, for example many depth cameras, already come with a factory intrinsic calibration. In this case, the intrinsic calibration step is not necessary, and the intrinsic calibration dialog is disabled, and only shows the camera's factory intrinsic parameters.
A ChArUco calibration marker and descriptor file are required for intrinsic calibration. We recommend using a professionally printed calibration board which can be purchased for example at calib.io. More information on recommended patterns can be found in our hardware documentation. We do support pre-configured descriptor files for the patterns from calib.io. You can also generate a PDF file to print the marker yourself at calib.io; however, a self printed pattern will be less accurate and produce worse calibration results.
Performing an intrinsic camera calibration
To carry out an intrinsic calibration, (typically a few dozen) camera images of a calibration pattern have to be acquired. They should cover the entire field of view and with different pattern orientations. You can move the pattern by hand through the poses. Try to keep the pattern as still as possible to avoid motion blur.
Before calibrating, ensure that you have a solution running on a physical workcell and that the camera is already configured.
Tips for high quality intrinsic calibration
- The more images used for calibration, the better. As a rough estimate, record at least 20 images.
- Use the live view to ensure that the whole field of view of the camera is covered by the calibration pattern. Try to cover the area as uniformly as possible, especially around the border regions. This is important to estimate the lens distortion accurately.
- Make sure that the pattern is in focus in the images that you record.
- Try to make sure that the pattern covers at least 50% of each recorded image.
- To achieve this, use a possibly large calibration pattern, and present it as close as possible to the camera - while still keeping it sufficiently in focus.
- Show the pattern at approximately 20-40 degrees to the image plane, so that some points of the patterns are closer to the camera than others. This is crucial for an accurate estimation of the focal length.
Re-calibrating the camera
The intrinsic camera parameters depend on various factors:
- Lens
- Focus setting of the lens
- CCD / CMOS sensor
- Resolution setting of the camera
If any of those factors change, the camera has to be re-calibrated. In contrast, note that the intrinsic parameters do not depend on the following:
- Aperture setting of the lens
- Exposure time and gain settings of the camera
Opening the intrinsic calibration dialog
-
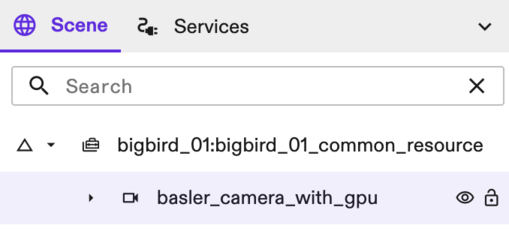
With your application open in Flowstate, go to the Scene Panel on the right side.
-
Select your camera in the Scene tree.
- In the Properties panel on the left side of the screen, under Settings, select the Intrinsic calibration option.

The intrinsic calibration dialog opens.
Initializing parameters
- Specify the calibration pattern you want to use. Choose the Pattern descriptor file available in your lab. If none is configured yet, install one from the catalog.
Acquiring an image
-
To begin, click the Start calibration button.
-
Move the calibration pattern by hand through the image. Try to hold it as still as possible to avoid motion blur, and cover the whole view space.
-
After a minimum of 10 images with a detected pattern have been acquired, the Calibrate button is enabled. It is recommended to acquire > 20 images for better calibration results.
To help determine whether the view space has been covered sufficiently, a transparent overlay of the view space coverage is placed over the image. This shows which parts of the field of view have already been covered. Blue regions indicate good coverage, while red regions symbolize poor coverage (with yellow to green for average coverage).

If needed, you can increase the frame rate of the camera by temporarily setting the exposure time to manual and to a lower value (e.g. 10 - 15 ms) and increase the gain in the camera configuration. For the sake of intrinsic calibration a slightly underexposed image should give good results. Remember to switch back to the previous setting after calibration is finished.
Calibrating
Once enough images have been acquired, press Calibrate. The calibration error and the intrinsic camera parameters that have been estimated are shown in the UI. The calibration error is given as the root mean square error of the distance of the detected image points and the back projection of the 3D model points of the calibration board.
You can acquire more images and re-calibrate, if needed. You can also view all accepted images and their rendered detections (on the left side) to see if any images have misdetections (which produces a high calibration error) and delete these images.
Click Save to save your results.